- 17 KWH Solar Panel System
- High Pressure-Low Volume
- Vacuum Pump Mounts made from BMW oil housing mounts
- This is an out of focused picture of the vacuum hose I used for the brake booster system. It is 3/8 inch fuel injection hose with a plastic inside liner. The heaver fuel Thinjection verses the standard fuel nose is less likely to kink, collapse or leak vacuum.
- Under hood Finished Wire Looms
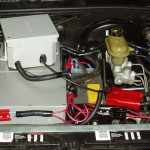
- Under hood View December 8 2008
- TV Interview
- TV Interview Plugging up
- Traffic Jam
- Toyota Yaris 2009
- Tire Rolling Resistance Torque Method Machine
- Telsa Roadster Electric Cars Rev Up
- Rear Springs & Struts New & old
- Old Left Rear Spring and Strut
- New Rear Spring & Strut Installed
- New Spring
- Spring Compression Tool
- Shield, Two Pieces Of Fuel Tank Bolted Together I attached the front of the shield with 6 mm bolts and nut to the front lower bumper guard.
- Shield Installed – Attaching bolts marked
- Saturn Weight After Conversion Left, Front, Rear, Cross
- Saturn Weight After Conversion
- On the Scales After Conversion
- Routing Cables With Protection Sleeve
- Finished: Right Inner Fender Where the Heater was installed
- Removing Failed Advanced DC EV Moto r Removing Failed Advanced DC EV Motor
- Paint Door Handles
- Paint Rear Bumper
- My lower strut mount dogbone
- Nissan Leaf
- Maiden Voyage Nov 22 2008
- 1972 Lunar Roving Vehicle (LRV) Astronaut Eugene A. Cernan, commander,during the early part of the first Apollo 17 Extravehicular Activity (EVA-1) at the Taurus-Littrow landing site.
- Using Locktight, the bolt on the left has locktight on it.
- FINISHED Left Front Power Brake Area with Inner fender in.
- Testing the Performance of the S.S.Saturn
- Driving the EV in the January Snow
- James Morrison in his Tesla
- James Edmonson Electric VW
- Drilling the Controller aluminum heat sink
- Heat Sink Compound: Heat Sink Compound for heat transfer from the controller to the aluminum sink.
- Fuel Tank in Two Pieces
- Gas Tank Cut In Two
- Low Pressure-High Volume
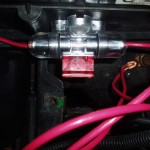
- Fuse Holder 50 Amp Between DC DC & Battery
- Emblem EV
- Emblem 144 Volt
- Electric Box #2 Final Design
- Electrical Panel Bottom View Almost Ready: Here you can see the cooling fan on the left and the Anderson Disconnect on the right. On top is the Curtis Controller on the left, 3 electric boxes in the center and the DC-DC convertor on the right with the plexiglass guard visible.
- Open Double Barrel Pliers
- Dave’s dog bone mount
- Dash Apart
- Electric Box #1
- Bottom up looking into the cooling fan.
- Control Board Cooling Fan installed
- Here is the hole saw and the 4″ hole it cut in the 1/2″ thick fiberglass, plexiglass board. That hole cutter is handy but dangerous. Four small holes and the controller cooling fan is installed on the underside of the board.
- Coil Firing from signal given
- Clutch Master Cylinder and Slave Cylinder Kit
- Electrical Panel Bottom View Almost Ready: Here you can see the cooling fan on the left and the Anderson Disconnect on the right. On top is the Curtis Controller on the left, 3 electric boxes in the center and the DC-DC convertor on the right with the plexiglass guard visible.
- Two of my Prizes
- May 9 2009 Humboldt Strawberry Festival
- Pump in lower background, Switch in the right and tank on the left.
- Advanced DC
- Advanced DC Field Windings: Advanced DC FB1-4001A Field Windings Showing Splatter of cooper against case
- Advanced DC Brushes
- Advanced DC Armature: Advanced DC FB1-4001A Armature after breakdown
- 1905 Electric Car


