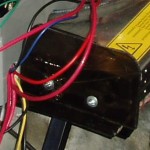
- Voltage DC DC to Battery after first adjustment
- Closeup: Crimping Cable With 3 Wires in a 90 Degree Flat 2/0 Magna Lug
- Elithion BMS Testing: Elithion Lithiumate Controller Here running some voltage tests.
- CALIB 130 amphour
- Battery box vent inlet in winter mode
- Square D Vacuum switch
- CALIB Arrive Crate Open
- CALIBs Arrive
- Servicing Testing and Recording Battery Pack Voltages
- Servicing Batteries with Distilled Water
- Building the 2 rear battery boxes
- Battery Boxes and connecting pipe
- Saturn EV Instrument Cluster
- Removing Upper Battery To Service Lower Ones
- Elithion Current Sensor Red Wire: Red wire on the 5 wire current sensor should be 15 volts.
- Rear Battery Boxes Finished
- DC-DC converter high voltage battery pack to 13 volt auxiliary power
- Banding: Banding CALIB 130 ah in six packs
- Banding battery packs. With end plates, lifting string, banding material and tools.
- Battery end plate: Sizing up end plates
- Cutting end plates: Craftsman table saw cutting end plates
- Oct25 Front Upper Battery Box Measure
- Front Upper Battery Box Check-Clearance
- Front Upper Battery Box Check-Clearance
- Pulling Cable
- Mas Tech Road Pro
- First key on view with CALIB batteries Mileage 182112
- Shipped voltage showing 159.5 volts: Shipped voltage showing 159.5 volts
- Sulfur Corrosion: Sulfur Corrosion on the old Lead acid terminals
- Lead acid cables verses Lithium cables: Lead acid cables verses Lithium cables shown with the tools, crimper, stripper, cutter
- Front battery box with the upper box removed because it is no longer needed.
- All Packs Banded: CALIB batteries banded and laid out viewed like you would be looking from the rear of the Saturn.
- First LiFePO4 Six Pack
- Cable Insulation Stripper: Application: For stripping insulation jacket on welding cable up to 4/0 GA. Configuration: Adjustable spring-loaded clamp
- Middle battery box with one battery removed
- Rear battery box with cables removed
- Underhood with upper battery BRACKETS removed
- Underhood LOWER batteries removed
- Underhood UPPER batteries removed
- Cables off
- Rear Battery Boxes with Lead Acid Batteries
- Hydrometer Testing Battery Specific Gravity
- Controller Heat Sink drilled to accommodate the six bolts to hold the controller on the sink and six to attach the assembly to the panel.
- Elithion Current Sensor Green Wire: Green wire on the 5 wire current sensors should have -15 volts. (negative 15)
- High Voltage main fuse in Location in trunk area.
- Watthour Meter Socket Box Setup
- GE CL200 DIGITAL METER WATTHOUR WATT HOUR
- Watthour Meter Socket Box Setup
- Cell Boards Installed, Elithion BMS
- Garage Door Opener
- The Big Cable-Lug Crimpers
- Cooling Fan underside of control Board
- Cell-Log8
- Cable Parts and Tools to make cables
- Two Cables made.
- Using the heat gun to shrink the shrink wrap
- Breaking Plexiglass Nov 15
- Elithion Current Sensor Black Wire: Black wire on the 5 wire current sensors should be ground and have no voltage.
- Trim Battery Cap Release
- Voltage reading on the White Charge Current Sensor 17 amp Flow
- 17 Amp Charger Reading
- 12 Volt Battery
- 3 prong connector coming together
- 3 prong connector finished
- Graphing meter display of tachometer signal of static motor on a Snap-On Vantage.


