In October 2011 I was driving to lunch down a local road, Vann drive with my wife when snap, crackle, pop > Rice Krispies.
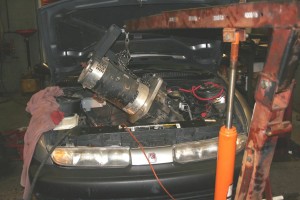
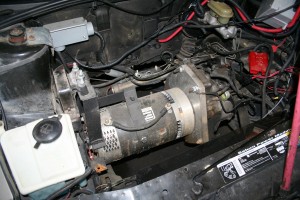
She said what was that? did you do that? I said no, ah oh. So I drive a little further with no problem but when I hammered the throttle (potentiometer) pop, pop again. I pulled over and raised the hood. Regina pressed on the accelerator while I watched. Sparks were coming out of the Advanced DC motor FB1-4001A, the end towards the transmission. This is the end opposite of the brushes. Towed her back to the shop.
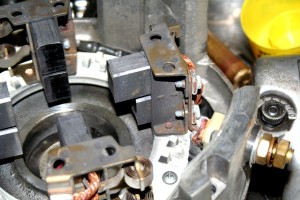
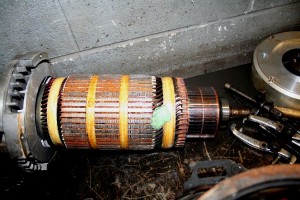
Removed the motor and disassembled the Fb1-4001. The armature looked fine as well as the commutator and brushes. The field windings have some speckling of cooper. I emailed and called EVAmerica and talked to Brian and Bob. I sent them pictures of the motor parts which they forwarded to their contacts at Advanced DC. This motor was 4 years old with only less than 12,000 miles on it.
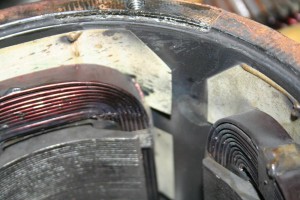
Advanced DC Field Windings: Advanced DC FB1-4001A Field Windings Showing Splatter of cooper against case
The advice emails follow…
Dan –
Sorry for the delay. I think this motor is savable.
The field coil set should be replaced. You can buy the FB1-2001 Frame and field assembly. This is the entire frame assembly. This he can replace himself and would not need a motor shop. If he wants to buy just coils that is part number FB1-1007A and FB1-1010A however this would definitely require a motor shop that has the capability to resistance weld the two coil sets together. (probably best off just buying the entire assembly)
The brushes do look ok in the picture. If you are going to re use these brushes I would just re install them and leave the commutator alone. If you are going to change the brushes then clean the commutator with something around a 400 grit emery, granite or even sand paper would be ok. Do not go coarser than 350 grit. Try to leave a cross hatch pattern on the commutator to allow the new brush material something to grab onto. Make sure to blow out all dust and filings very well before reassembling.
If the springs are in question the part number is B89-016. Also make sure the holders are secure to the base. This is very important. The complete brush box assembly is FA0-1064.
If you do want to replace the brushes with Helwig parts the specific part number that you want for this motor is A89-012K. You will have to ask Dan for this specifically. We just started caring and using Helwig parts for specific applications. They are 10x better than any other equivalent brush we ever had.
Also just a thought. Before you go too crazy rebuilding the motor he should have the armature checked for shorts just to be safe.
Hope this helps,
Michael Alivero
Project Engineer
Advanced Motors and Drives
Dan –
The price of the field and frame is $750. There are 8 springs, each one is $4 each. If you are interested in the Helwig brushes, there are also 8 of them and they are $10 each. The field and frame has an 8-week lead time.
Bryan @ EVA
So I could either:
1. repair this motor, put $800 plus, and labor and risk of repeat failure in this motor
2. replace with another Advanced DC FB1-4001A
3. replace with a WarP 9 Netgain replacement
4. go with a totally different power plant like a AC motor or brushless DC which would include replacing mounts, controller and more.
I choice #3, to install the WarP 9 Netgain motor. I ordered it from [[http://www.evamerica.com|Electric Vehicles of America]]. They gave me a discount because I bought the Advanced DC from them. The WarP 9 motor cost $1550 plus $165 shipping.
The WarP 9 arrived a week or so later.
Here are the differences I found.
1. WarP 9 is .9 cm longer
2. The large Eyelift hole is 5/8″ X 11 thread but is .9 centimeters farther from the bush end.
3. WarP 9 has 2 sensors instead of 1. Thermal sensor contacts open above 120°C
4. Uses 5/16″ X 18 instead of 3/8″ X 16 on front of motor and pattern is different
5. Instead of .750″ dual front shaft diameter WarP 9 has a .875″
6. The 4 electrical Lugs are bigger .5″ instead of 3/8″
I had to modify the center mount by moving the strap hole about 1 centimeter and the bracket from the front mount the same. Also the strap’s eyelift hole had to be moved up over 1 cm.
The front mount had to be redone with added medal and three new holes drilled for the new pattern.
The tach sensor gear had to be drilled out from 3/4″ to 7/8″. All for lug cable ends were drilled to the larger 1/2″.
When testing the WarP 9 I picked up a slight vibration with the motor- adapter assembled. The 12 battery spun the motor fairly fast. I disassembled the hub and adapter and spun the motor by itself and noticed no vibration. When reassembled with adapter and hub alight vibration returned. With flywheel and clutch installed a second time vibration was still there. So I continued and assembled the transmission etc.
Test drove.
Seems good but at higher speeds and RPMs there is a hum noise (may be from the balance vibration).
Controller Board Out: Controller Board removed and placed to side to access failed Advanced DC motor
