As I posted earlier and I made a decision to change out the liquid heater to a ceramic heater and [[http://saturn.lynnautorepair.com/2009%20Summary|gave the reasons why.]]
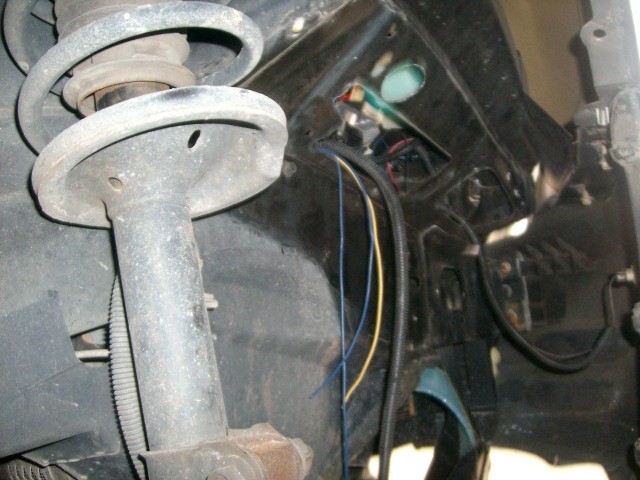
Heater Box Area in Right inner fender in front of tire heater parts
removed
I installed the heater box inside the right inner fender behind the bumper.
This was done similar to the power brake components that are in the left inner fender area.
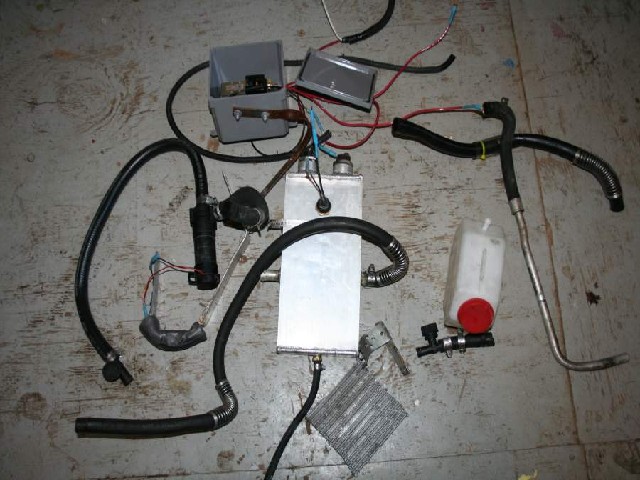
Liquid Heater Parts Removed
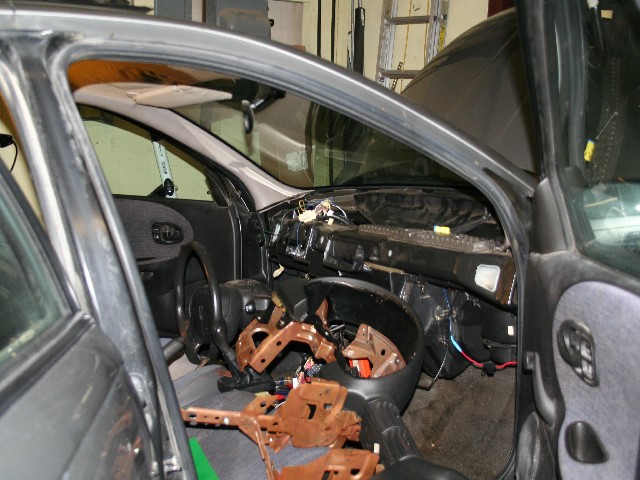
Have removed the dash, dropped the column, removed the complete heater HVAC housing and all of the old liquid heater system, tank, hoses, relays and motor.
Removed the evaporator core, cut out the center of the heater core to install the ceramic heater element. No more antifreeze, having to insulate the hot water tank, electric pump, reservoir tank, hoses & waiting 5 minutes for heat. Also I will be drawing 1500 watts instead of 3000 watts. One of the 20 amp KLK fuses in the electric box #1 will not be used now.
This ceramic heater will be 144 volt not 12 volt.
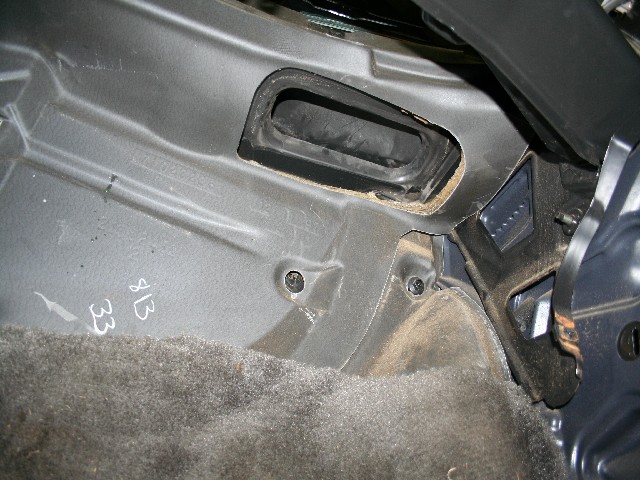
Looking Up Under Right Side of Dash At Fresh Air Intake
Outside View of Fresh Air Vent Intake
I found that the recirculate motor (actuator) is bad. That is why I would get a cold draft in winter and weak venting in the summer. With Saturn going out of business I wondered during this transition time where will I find it. Soon other GM dealers will carry them. Anyhow I found the part at http://www.GetSaturnParts.com. The actuator cost $33.77 and shipping.
.
Air flow or no air flow is more important in a vehicle with limited heat no summer cabin cooling. As you can see the recirculate door gets its fresh air from a hole in the top right side of the firewall. You can access this recirc door and motor after removing the easy to lift top dash piece. Raise the hood and see the inlet for the fresh air.
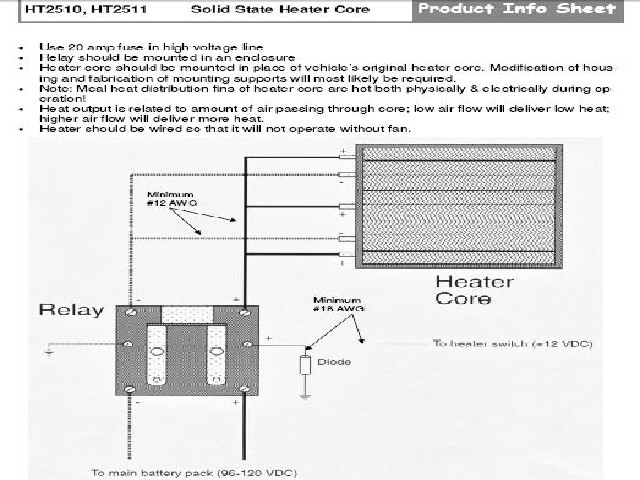
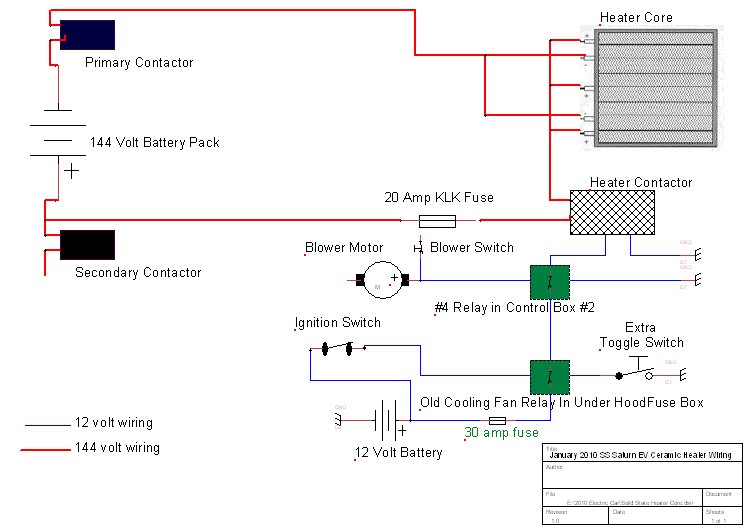
HT2510 Solid State Heater Wiring
I ordered the high voltage Solid State heater Core #HT2510 from http://www.EVparts.com at EV Parts, Inc 157 West Cedar Street Sequim, WA 98382 TEL: 360-582-1271 FAX: 360-582-1272. Cost was $105 plus $10 shipping. It is only the core, with 5 flat blade connectors. Three are positive and 2 negative.
The instructions state:
* Use 20 amp fuse in high voltage line
* relay should be mounted in an enclosure (I used the same relay and box as before)
* heater core should be mounted in place of vehicle’s original heater core. Modification of housing and fabrication of mounting supports will most likely be required.
* note: metal heat distribution fins of heater core are hot both physically and electrically during operation.
* heat output is related to amount of air passing through core; low air flow will deliver low heat; higher air flow will deliver more heat.
* heater should be wired so that it will not operate without fan

Heater Element Installed in Original Core
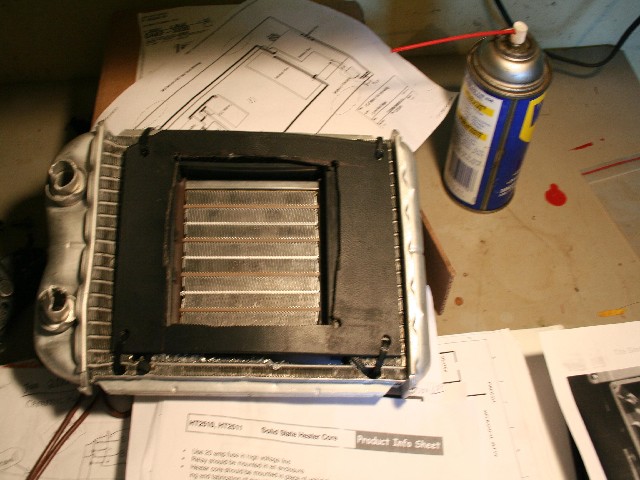
Heater Core Installed in Original Core with shield
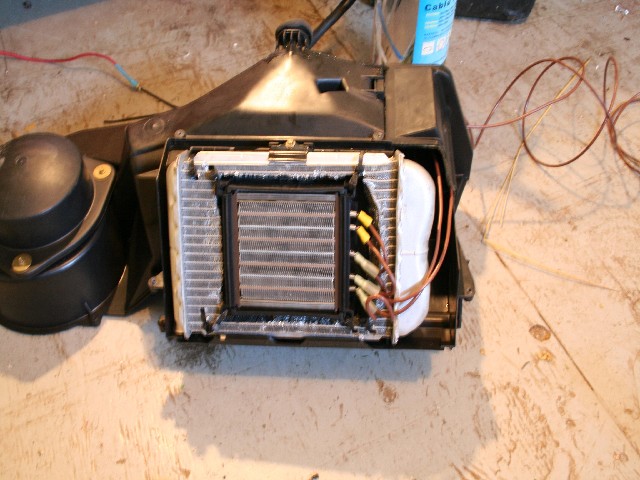
Heater Core Installed in Original Core in HVAC case

Heater HVAC Front View Before Install
After removing all the HVAC and opening up the case I permanently removed the evaporator core to increase the air volume.
I cut out the center of the original heater core and strapped the ceramic core to the center. I wired up the positive and negative leads with 12 gauge wire. I added a shield to divert most of the air flowing from the blower to center through the ceramic fins. After installing the core (cores) I routed the wires out the access hole for the old heater core tubes. Next block the evaporator firewall openings.
I replaced the recirculate actuator and tried it out before install the whole caboodle. Run a hot and ground to the 2 leads and the door moves slowly all the way one way. Reverse the leads and the door moves slowly all the way the other. (recirculate or fresh)
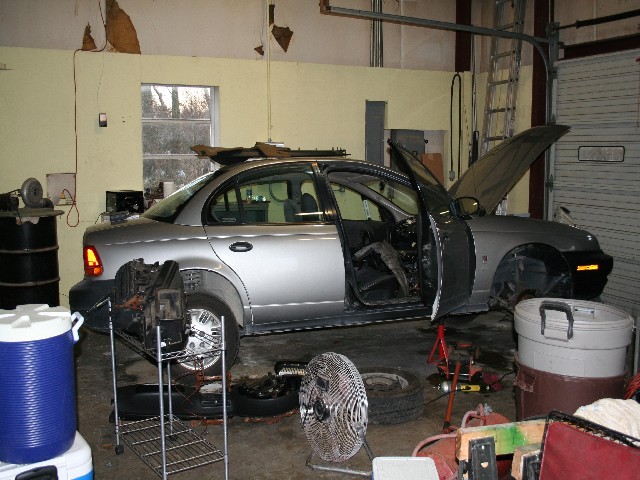
Going Back Together with Heater
HVAC installed
HVAC in and Dash about to go in
Assembled the housing and installed it with the 3 screws and 2 nuts going through the firewall.
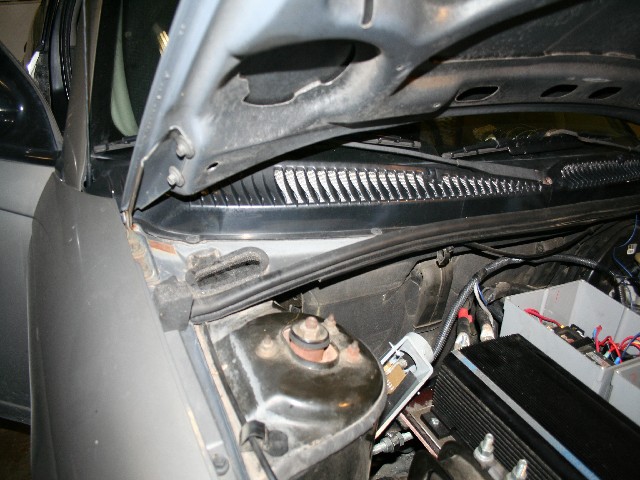
Much cleaner under the hood now without all the pipes, pump etc.
Put dash, glove box, console steering column, cluster, radio etc. together.
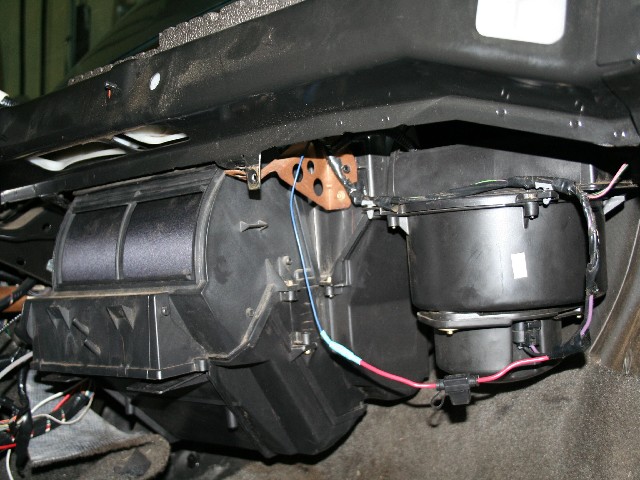
Use one relay to have extra manual control of ceramic heater. Also it will not come on unless the blower is on. See the wiring diagram.
I used the old electrical box and heater contactor. I mounted it under the hood to the right strut tower.
Saturn Ceramic Heater Wiring Diagram
So got to drive the Saturn today for the first time in a month and with the new heater. Heater works will heats within a minute. Not sure how good the heat is since it is around 50 f today. Volume is better and do not notice cold outside air coming in as before.
Will see have the next week goes with cold front on the way.